

To guarantee lead flashing replacement, start by carefully removing the old flashing and inspecting the underlying area for damage. Clean and prepare the surface before cutting the new lead to the required size. Make sure it fits snugly and conforms to the roof contours. Secure the flashing using appropriate fixings and apply patination oil to protect against weathering. For repair, inspect existing flashing for signs of wear or damage. Replace any compromised sections and seal gaps using specialized roofing caulk. This diligent approach will help maintain your roof’s integrity and prevent water damage. More detailed guidelines can enhance your understanding of these essential maintenance tasks.
What is Roof Flashing and Why is it Important?
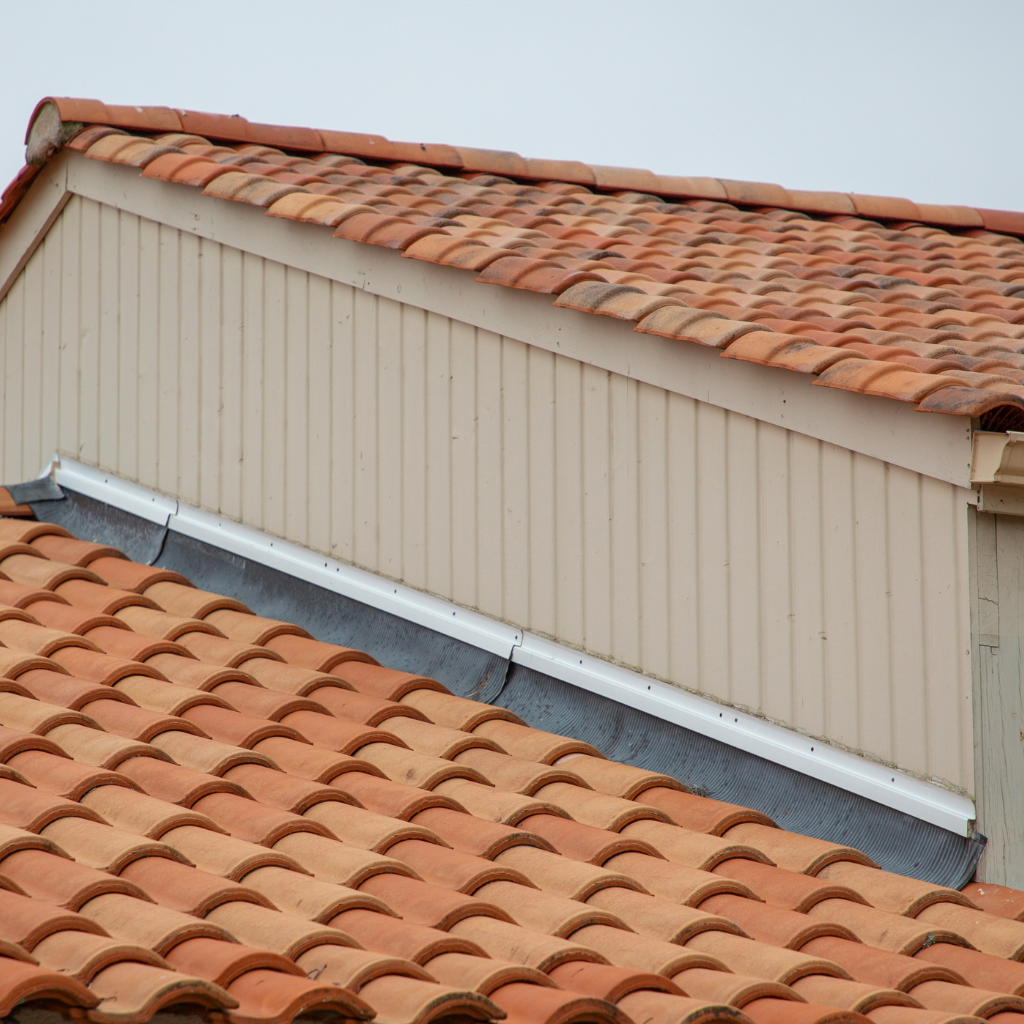
Roof flashing is a critical component designed to prevent water from penetrating the structure at intersections or projections on a roof, such as chimneys, valleys, or joints. Proper installation and maintenance of lead flashing are essential for safeguarding against leaks that can cause significant damage to a building’s interior and structural integrity.
As we explore the various types of roof flashing and their specific roles, it is important to understand both the function and the materials commonly used, including the traditional and durable lead flashing.
Understanding Lead Flashing
Lead flashing plays a vital role in sealing the junctions on a roof to prevent water ingress and protect structural integrity. When considering roof repairs, it’s important to evaluate the condition of existing flashing. Over time, lead flashing can deteriorate, leading to roof flashing problems that may compromise the watertight seal necessary for a lead roof.
When you install lead flashing, make sure that the flashing depth is sufficient to handle the volume of water typical for your area, maintaining an effective barrier against water penetration. Proper fitting flashings are critical; they must be snug and secure to avoid any displacement that could create open gaps for water to enter.
If you find it necessary to replace your lead flashing, consider the following steps to visualize the process:
- Inspection: Carefully inspect the existing flashing and surrounding roofing material to assess the extent of wear or damage.
- Removal: Gently remove the damaged or old lead flashing, taking care not to damage the underlying roofing materials.
- Installation: Fit the new lead flashing, ensuring it conforms to the contours of the roof and provides a continuous, watertight seal.
The Role of Roof Flashing in Leak Prevention
Flashing serves as an essential barrier, strategically placed to prevent water leaks by sealing the intersections and terminations on a roof. This critical component is fundamental for maintaining the integrity of the roofing system and protecting the structure from water damage.
Properly installed and maintained roof flashing channels water away from vulnerable areas where the roof plane meets a vertical surface, such as walls, bay windows, or chimneys, effectively preventing leaks that can lead to costly repairs.
When roof flashing is damaged, its ability to seal off water entry points is compromised, potentially resulting in a leaking roof. To guarantee the longevity of your roofing, it is imperative to inspect the flashing for signs of wear or damage regularly.
Timely flashing repair is crucial to maintain its effectiveness in leak prevention. Neglecting damaged roof flashing can lead to more significant issues, including structural damage and interior water damage.
Homeowners and building managers should prioritize regular maintenance checks to identify any flashing needs early on.
Prompt repair of the roof flashing reinforces its role as a safeguard against roof leaks, ultimately maintaining the building’s structural integrity and preventing leaks that could cause significant damage and costly repairs.
Common Types of Roof Flashing
Recognizing the various types of roof flashing is essential for ensuring the effectiveness of this protective element in your roofing system. Flashing is installed at every point where the roof meets another surface, such as walls, chimneys, windows, and skylights, to prevent water from seeping into the building.
Proper installation and maintenance of roof flashings are important, especially when you need to replace roof flashing due to damage or wear.
- Lead Flashing: Traditionally used for lead, it is highly durable and malleable, making it ideal for complex joints and shapes around chimneys and dormers. However, damaged flashing made from lead requires careful handling when being replaced or repaired due to health and environmental concerns.
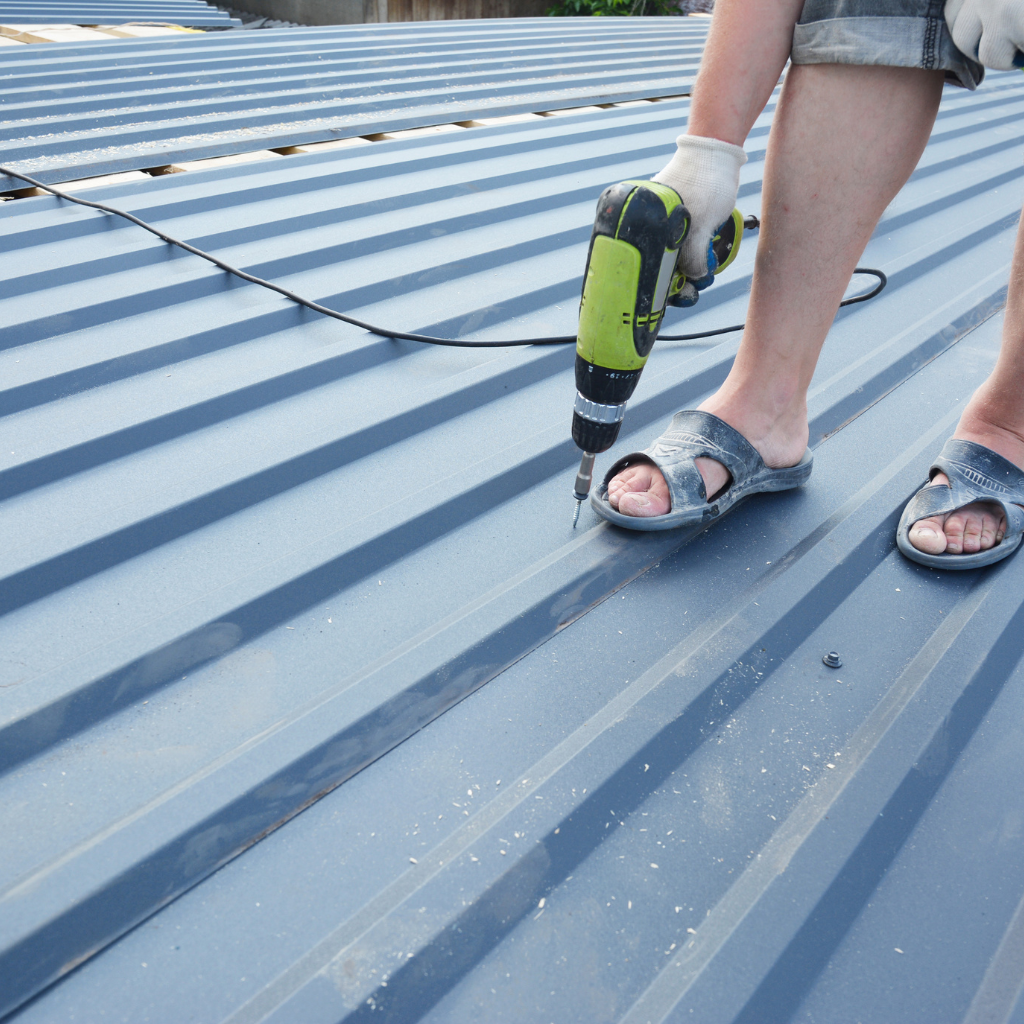
- Metal Flashing: Includes materials like aluminum, copper, and galvanized steel. Metal flashing is less expensive than lead and offers good resistance to corrosion. It’s commonly used along roof edges, valleys, and around skylights.
- Step and Counter Flashing: This technique is used where a vertical surface meets a sloped roof. Step flashing protects the joints, while Counter flashing is layered over it to provide an additional barrier against water infiltration.
To fix roof flashing, it’s important to identify the type suited for your specific roof configuration and environmental conditions.
When Should You Replace Roof Flashing?
Determining the appropriate time to replace roof flashing is essential for maintaining the integrity of your roofing system. Key indicators, including visible signs of damage such as rust, cracks, or separation, signal that the flashing may no longer be performing its protective role effectively.
Additionally, factors like severe weather conditions and the presence of leaks or corrosion can further compromise the flashing’s effectiveness, necessitating timely replacement to prevent more extensive damage.
Signs Your Roof Flashing Needs Replacement
How can you tell if the roof flashing on your home requires replacement? Recognizing the signs early can save significant roof repair costs and prevent the damage that leaks and rainwater intrusion can cause. Here are three key indicators that your roof flashing, especially if it’s old flashing or lead flashing, might need to be replaced:
- Visible Damage: Inspect your roof flashing for visible signs of damage, such as large cracks, rust, or holes. These flaws can enable water to penetrate, potentially leading to leaks that damage the interior of your home.
- Age and Corrosion: Over time, even the best-installed lead flashing will deteriorate. If your flashing has turned brittle or shows signs of corrosion, it’s a clear signal that the material is past its prime and likely ineffective at repelling water.
- Frequent Repairs: If you find yourself constantly calling professional roofers to patch up or fix issues with your roof flashing, it may be more cost-effective to replace your roof flashing altogether. Frequent repairs can be a symptom of underlying issues that mere patch-ups won’t solve permanently.
Address these signs promptly to guarantee your home remains safe and dry.
The Impact of Leaks and Corrosion on Roof Flashing
Leaks and corrosion in roof flashing greatly compromise the structural integrity of your roof, necessitating timely replacement to prevent extensive damage. The presence of these issues often signals that the flashing is no longer providing the necessary barrier against water penetration. Lead flashing, commonly used due to its durability, is particularly susceptible to corrosion over time. Factors like improper installation or physical damage can hasten this deterioration.
When identifying when to replace roof flashing, look for visible signs of corrosion like discoloration, rust, or pitting on the metal surfaces. Leaks may be less obvious but can manifest as water stains or dampness in areas adjacent to the flashing, especially after heavy rain.
Immediate repair or replacement is vital once these symptoms are detected. Delaying this fix can lead to more severe problems, including structural decay and mold growth inside your property.
It is advisable to consult with a roofing professional who can assess the extent of weather damage to decide whether repair or full replacement of the flashing is necessary. Always make sure that any new installation is carried out using high-quality materials and by experienced technicians to restore the full protective function of your roof.
How Weather Conditions Affect Flashing Integrity
While various weather conditions can drastically impact the integrity of roof flashing, it is essential to understand when replacement is warranted to maintain peak roof performance. Constant exposure to the elements can gradually degrade the efficacy of flashing materials, especially in regions prone to severe weather fluctuations.
Recognizing the signs that indicate the need for roof replacement or repair of flashing is important for preserving the structural integrity and water resistance of your roof.
- Lead Flashing Leaks: Frequent exposure to rain and moisture can cause lead flashing to deteriorate, leading to leaks. It is essential to inspect the flashing for any signs of water penetration, which can compromise the roofing materials.
- Loosened Fasteners: High wind conditions can cause screws and other fasteners to loosen over time. If the flashing isn’t securely attached, it can allow water to seep beneath, exacerbating the risk of damage and necessitating immediate attention.
- Visible Corrosion or Wear: The combination of rain, wind, and other environmental factors can erode the surface of the flashing. Any visible signs of corrosion or excessive wear are clear indicators that the flashing needs to be replaced to block further damage and maintain the roof’s integrity.
How to Replace Lead Flashing: Step-by-Step Guide
To effectively replace lead flashing on your roof, it is important to prepare with the right tools and materials, ensuring all necessary items are at hand before beginning the project.
The next section offers a comprehensive, step-by-step guide on how to remove old flashing and install new lead flashing securely.
Additionally, adhering to safety protocols is essential to prevent any accidents during the DIY flashing replacement process.
Tools and Materials You Will Need
Before beginning the replacement of lead flashing on your roof, it is essential to gather all necessary tools and materials. Making sure you have the correct items on hand will streamline the process and contribute to a professional-quality repair or replacement of the roof flashing. Here’s what you will need:
- Lead Flashing and Fixings: The lead flashing itself is, of course, the primary material. Ensure you have the correct type and size for your roof’s requirements. You will also need appropriate fixings, such as nails or clips specifically designed for lead work, to secure the flashing in place.
- Tools for Cutting and Shaping: Lead dressers and cutting tools are important for accurately shaping and installing lead flashing. These tools enable precise adjustments and help fit the lead snugly against the roof contours, preventing water ingress.
- Protective and Finishing Materials: Use patination oil after installing the lead flashing. This oil helps prevent the oxidation of the lead, maintaining its effectiveness and appearance. Additionally, gloves and safety goggles are essential for personal protection during the installation process.
Gathering these specific tools and materials before starting your project can save time and ensure a successful execution. If unsure about any part of the process, consider seeking professional help to guarantee the integrity of your roof repair.
Step-by-Step Instructions to Replace Your Lead Flashing
Having gathered all the necessary tools and materials, let’s proceed with the step-by-step guide on how to replace your lead flashing. This process is important for both your flat roof and pitched roofs to guarantee that they remain waterproof and damage-free, especially around structures like chimneys.
- Remove Old Flashing: Carefully lift the tiles or shingles adjacent to the old lead flashing. Use a slate ripper if dealing with a pitched roof with slate tiles. Make sure not to damage the underlying roofing materials.
- Prepare the Surface: Clean the area thoroughly, removing any old mortar, Debris, and corrosion. This step is essential for the new flashing to adhere properly and provide effective waterproofing.
- Install New Lead Flashing: Measure and cut the new lead flashing to fit. Secure it into place, starting from the bottom and working upwards to overlap correctly. Use flashing clips for a firm fit, especially on a pitched roof.
- Seal and Finish: Apply a suitable sealant along the edges of the lead flashing to prevent water ingress. Realign or replace the tiles or shingles you initially moved.
Here’s a quick reference table for your convenience:
| Step | Key Focus |
|---|---|
| Remove | Lift tiles, avoid damage |
| Prepare | Clean area thoroughly |
| Install | Secure and overlap properly |
Follow these guidelines to ensure a professional and durable installation of your new roof flashing.
Safety Tips for DIY Flashing Replacement
When replacing lead flashing on your roof, always ensure safety by wearing proper protective gear, including gloves and eye protection, to mitigate the risk of injury. Roof repair, especially involving lead flashing, entails certain risks that necessitate diligent attention to health and safety protocols.
Here are three essential safety tips for DIY flashing replacement:
- Proper Footwear and Harness: Make sure you wear non-slip boots to prevent slips and falls. If working at significant heights, use a safety harness tethered securely to a stable anchor point. This precaution helps maintain balance and safety while maneuvering on the roof.
- Secure Ladder and Scaffolding: Before climbing onto your roof, confirm that your ladder is stable and firmly positioned. If necessary, use scaffolding to provide a stable working platform. Always have someone spot you while you are on the ladder to enhance stability.
- Awareness of Surroundings: Be mindful of your environment. Refrain from working in unfavorable weather conditions like rain, high winds, or extreme temperatures. Keep the work area clear of tools and Debris to prevent tripping hazards.
For complex or large-scale projects, consider consulting local roofing companies or an experienced roofing contractor. If unsure, don’t hesitate to give us a call for advice or professional assistance.
Should You Hire a Roofer for Flashing Repair?
Deciding whether to hire a professional roofer for flashing repair involves considering various factors that impact both the quality of the work and the long-term integrity of your roof.
Evaluating the benefits of professional expertise can help you make an informed choice that safeguards your home against potential water damage.
It is important to weigh the costs associated with hiring a roofer and to understand the criteria for selecting a reliable roofing contractor.
Benefits of Hiring a Professional Roofer
Hiring a professional roofer for flashing repair guarantees high-quality artistry and adherence to safety standards. When it comes to maintaining the integrity of your roof, getting a professional to fit lead flashing or repair existing material is vital. Roof flashing is a key component in Protecting against water damage and extending your roof’s lifespan. A reputable roofing company employs specialists who are adept at replacing damaged flashing and skilled in leak repair, ensuring that the job is done correctly.
Here are three significant benefits of engaging a local roofing professional:
- Expertise and Precision: Roofing specialists are skilled in detecting problems that may be unnoticed by the untrained eye. Their expertise ensures that all aspects of flashing installation and repair are handled with precision.
- Appropriate Materials and Tools: Professionals have access to high-quality materials and the correct tools required for effective flashing installation. This is essential for guaranteeing that the job lasts.
- Safety Compliance: Roofing work can be hazardous. Professional roofers adhere to strict safety standards to protect themselves and their property, mitigating any risk of accidents.
Evaluating Roof Repair Costs
Evaluating the costs involved in roof repair, particularly for replacing lead flashing, is a critical step in ensuring financial efficiency and maintaining the quality of your roof. The cost of such repairs can vary greatly depending on several factors, including the extent of damage, the type of property, and the specific requirements of the roofing system.
Lead flashing, commonly used to prevent water ingress at junctions such as where the roof meets the chimney or around dormer windows, often requires careful handling and precise placement. If the apron flashing is improperly installed or damaged, it can lead to significant water damage over time. Repairing or replacing lead flashing typically involves removing old material, cleaning Debris from the area, and ensuring that the new flashing is securely integrated with the apron flashing and the mortar between two brickwork sections.
The complexity of this task means that the cost can increase, especially if there is extensive damage or difficult access to the wall or roof. Additionally, ensuring that all repairs meet the current Compliance with building codes can increase the total cost.
Homeowners should consider these factors when deciding whether to hire a professional roofer for flashing repair, as the long-term protection of their property could outweigh the initial costs.
How to Choose the Right Roofing Contractor
Selecting the right roofing contractor is crucial for guaranteeing that lead flashing repairs are performed accurately and efficiently. When looking to replace lead flashing or repair roof flashing, the integrity of your house’s roof hinges on the expertise and reliability of the contractor you choose. It’s about securing a safeguard for your building against future water damage.
When choosing a roofing contractor, consider the following key factors:
- Expertise and Experience: Confirm the contractor has substantial experience with roof and flashing repairs, specifically with materials like lead. Their past projects and customer testimonials can offer insights into their capability and quality of work.
- Licenses and Insurance: A legitimate roofing contractor should have the necessary licenses to operate in your area and sufficient insurance to cover any potential damages. This documentation not only protects them but also provides you security against liability.
- Detailed Quotation and Contract: A professional contractor will offer a detailed quote detailing the scope of work, materials, timelines, and costs, and costs. Ensure the contract includes terms on warranty and post-job cleanup, adding an extra layer of protection for your investment.
Always contact multiple providers to compare expertise, reviews, and quotes before deciding to secure the best service for your house and roof.
Preventing Future Roof Leaks: Maintenance Tips
To ensure the durability and performance of your roof after flashing replacement, it is important to adhere to a regimen of regular inspection and maintenance.
Understanding the proper techniques to seal and protect your flashing can greatly prevent water intrusion and related damage.
Additionally, employing a series of strategic, preventative measures can substantially extend the overall lifespan of your roof for more money and safeguard your investment.
Regular Inspection and Maintenance
Regular inspection and maintenance of roof flashings are crucial for preventing water infiltration and enhancing the longevity of your roofing system. Focusing on lead flashing, shingles, and other critical components, such as gutters, can save homeowners from costly repairs. Ensuring that each piece of flashing is inspected systematically helps identify potential weaknesses before they lead to significant damage.
To effectively maintain your roof and prevent future issues, consider the following practical steps:
- Biannual Inspections: Schedule detailed roof inspections twice a year, Ideally in spring and fall, allowing for winter damage assessment and preparation for summer storms. Pay special attention to the lead flashing around chimneys, skylights, and conservatories, areas where leaks frequently develop.
- Clear Debris Regularly: Keep gutters, downspouts, and roof surfaces clear of leaves, twigs, and other Debris. Blockages can lead to water pooling, which increases the risk of leakage under shingles and flashings.
- Prompt Repairs: If you spot any damage, such as a lifted shingle or a loose piece of flashing, address it immediately. Delaying repairs can exacerbate the problem, potentially leading to more extensive and expensive damage to the roof structure and interior of the home.

How to Seal and Protect Flashing
Sealing and protecting roof flashing is a crucial step in preventing future leaks and ensuring the longevity of your roofing system. Once you replace lead flashing or install new sections, it’s essential to seal and protect this important component properly.
Lead flashing, known for its durability and flexibility, serves as a barrier against water at joints and intersections on the roof. However, to maximize its effectiveness, a proper seal must be guaranteed.
Start by applying a specialized caulk to seal any gaps or edges around the exposed lead flashing. This caulk is designed to adhere to the thin metal, creating a waterproof seal that guards against moisture penetration. Make sure that the caulk is evenly applied and fully covers all potential entry points for water.
Next, inspect the installation to confirm that the lead has been cut and shaped accurately, allowing it to lie flat and integrate seamlessly with the surrounding roofing materials. Any raised edges or misalignments can compromise the seal, so these should be addressed promptly.
Regularly check and maintain the sealed areas, reapplying caulk as needed to uphold the integrity of the flashing. This proactive approach will protect your roof from water damage and extend the life of the lead flashing.
Tips for Extending the Lifespan of Your Roof
Maintaining your roof regularly is crucial for extending its lifespan and preventing future leaks. Proper care guarantees that elements such as lead flashing remain intact and functional, safeguarding your home against water damage and the elements.
Here are three key maintenance tips to help you keep your roof in excellent condition:
- Inspect and Replace Lead Flashing: Periodically check the condition of lead flashing. Look for signs of corrosion or damage, and make sure it remains securely attached. If you notice any issues, replace the compromised sections immediately to maintain a water-resistant barrier.
- Clear Debris and Maintain Drainage: Keep gutters, drains, and roof surfaces free from Debris such as leaves and branches. This helps avoid water buildup, reducing the risk of leaks and damage over time. Regular cleaning, especially after storms, helps protect roofing materials and lead flashing from unnecessary wear and pressure.
- Check for Wind and Weather Damage: Check your roof for signs of damage following severe weather events. Shingles should be secure, and flashing should not be lifted or shifted. Timely repairs can stop minor issues from escalating into major problems, keeping your roof resistant to wind and structurally sound.
Conclusion
To sum up, the replacement of lead flashing and the repair of roof flashing are critical tasks for maintaining the structural integrity of a building. Proper installation guarantees effective water diversion, thereby reducing the risk of water damage.
Regular maintenance and timely replacement of damaged or worn flashing can prevent costly repairs and extend the lifespan of the roof. Engaging professional services for such tasks is recommended to guarantee the safety and quality of artistry.


