

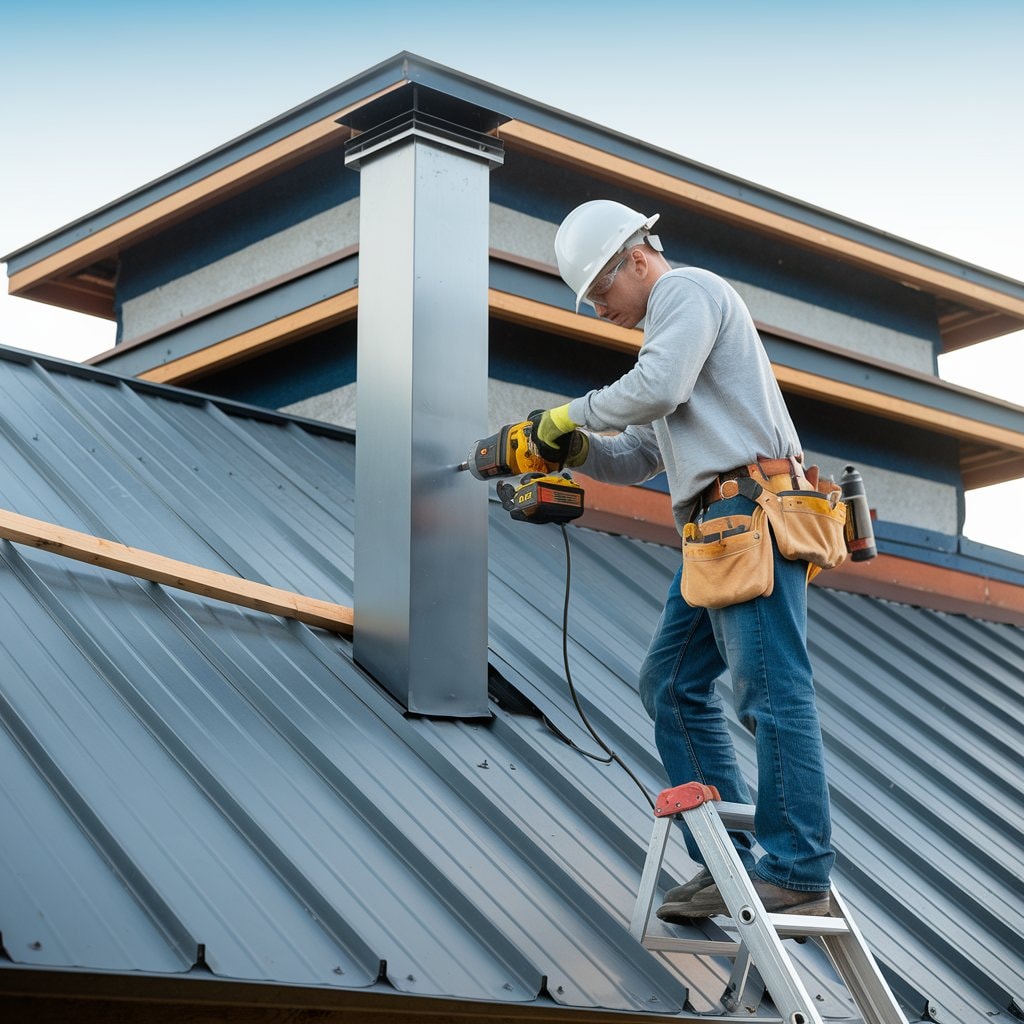
Installing a wood stove chimney through a metal roof might appear challenging. Many homeowners have concerns about possible leaks and the security of the installation. Recognizing that appropriate tools and techniques can transform this task into a manageable one is valuable insight.
This article will advise you on how to install a chimney through a metal roof, covering all aspects, including creating the opening and ensuring a watertight seal around the pipe.
We’ll share detailed guidelines to assist you in achieving a flawless installation. Continue reading for comprehensive information.
how to install a chimney through a metal roof
What are the Key Considerations for a Chimney Installation?
Moving forward from the introduction, let’s concentrate on what should be kept in mind before fitting a chimney through your metal roof. You must comprehend the significance of chimney clearance initially.
This entails maintaining the flue at a secure distance from any flammable materials to prevent fires. The building regulations in the United Kingdom prescribe particular requirements for this, assuring safety around your residence.
These guidelines are crucial to observe.
Selecting the most suitable chimney kit for your stove is another pivotal step. Options vary from single-wall pipes that are ideal for indoor use to insulated pipes made for transiting through areas such as attic spaces safely.
Each kind provides a different function and presents various levels of defense against heat transmission. More importantly, you should validate the proper ventilation of the chimney pipe vent, which requires picking the right roofing materials and supplemental items, such as flashings and storm collars, to generate a watertight seal around the insertion point of the chimney through the roof.
Understanding the Importance of Chimney Clearance
Ensuring proper chimney clearance is crucial for the safety of your home. The space around the chimney prevents heat from transferring to combustible materials, like wood or insulation, which could lead to fires.
The necessary clearance may differ based on the type of stove pipe you use; a single wall pipe needs more space than a double or triple wall pipe. Adhering to these guidelines ensures a safe environment around your wood-burning stove.
Proper chimney clearance keeps your home safe and enhances the performance of your wood stove.
Installing the chimney with enough clearance also ensures optimal performance of your wood-burning stove. It allows enough airflow for efficient combustion inside the flue pipe and reduces risks of creosote buildup, which is another fire hazard.
Always check that you’ve met all clearance requirements to safeguard against potential dangers while keeping your home warm during colder months.
Choosing the Right Chimney Kit for Your Stove
After comprehending the significance of chimney clearance, the subsequent step is selecting the ideal chimney kit for your stove. This decision plays a crucial role in guaranteeing a successful setup and prime performance.
Chimney kits are available in various forms, such as double wall or twin wall pipes, created for diverse heating systems including wood-burning stoves. An accurate pairing between the stove’s flue size and the chimney kit guarantees efficient smoke clearance and minimizes fire risks.
Selecting an appropriate chimney kit also requires thinking about materials capable of enduring high temperatures, like stainless steel for metal chimneys. Moreover, you should verify if your selected kit encompasses all essential parts like flashing, storm collar, roof support bracket, and rain cap to establish a leak-proof seal around the base of the chimney on the roof’s summit.
Choosing a harmonious kit simplifies installation and significantly enhances safety by offering an added layer of protection against leaks and heat damage to your house’s structure.
Ensuring Proper Chimney Pipe Ventilation
Proper chimney pipe ventilation is crucial for the safe operation of your wood stove. It ensures that harmful gases escape from your home effectively. To achieve this, you must maintain clearances around the flue inside the chimney.
This prevents heat transfer to combustible materials near the chimney. You also need to install a double wall pipe that offers an additional layer of protection by keeping the exterior surface cooler.
Next, focus on cutting a precise hole in your metal roof. This will create a path for installing the chimney through it.
How to Cut the Hole in Your Metal Roof for the Chimney?
Cutting a hole in your metal roof for a chimney requires precision and care. This step is crucial for installing a wood stove chimney safely and effectively.
- Gather all necessary tools before starting. You will need a drill, jigsaw or nibbler, measuring tape, marker, plumb bob, straight edge or ruler, along with safety equipment like gloves and goggles.
- Measure the location of the chimney on the inside of your house to determine where it will pass through the roof.
- Use a plumb bob from the ceiling to the roof to find the exact spot above where the stove will sit.
- Mark the center point on the metal roof’s surface using a marker.
- Outline the hole on the roof using the chimney kit’s flashing as a template. Make sure it’s slightly larger than the pipe to accommodate the flashing.
- Drill a small hole at one corner of your marked outline to start cutting.
- Insert the blade of your jigsaw or nibbler into this starter hole and cut along the marked lines carefully.
- Use a file or sandpaper to smooth out any sharp edges to prevent injury and protect roofing materials.
- Check that you have not damaged any underlying structures like rafters or joists while cutting.
By following these steps, you can cut a precise hole in your metal roof, ready for installing flashing over it and then setting up your chimney pipe securely through it.
Tools Required to Cut the Roof Hole
To start cutting the roof hole for your chimney, you need a few essential tools. A drill will create a pilot hole to guide your cuts. For the actual cutting, use tin snips or a reciprocating saw with a metal-cutting blade designed for sheet metal.
Ensure you have roofing nails and silicone caulk on hand as well, which will be vital for later steps in securing and sealing components.
Measuring tape is crucial for the accurate placement of the hole on your roof surface. Don’t remember safety equipment: gloves to protect your hands from sharp edges and goggles to keep metal shavings out of your eyes.
With these items ready, you’re set to proceed with installing the chimney through your metal roof safely.
Measuring and Marking the Roof Surface
Carefully measuring the surface of the roof is crucial before you cut a hole in your chimney. You need to find the exact spot where the stove pipe will go through. Take precise measurements with a tape measure from both inside and outside of your home.
This ensures that the pipe aligns correctly with your wood stove and avoids any structural beams.
Next, mark the spot on your metal roof panels where you’ll install the chimney. A chalk line works well for this task, creating clear, visible lines over which you will cut. Make sure these lines match up with the measurements taken earlier.
Accuracy here prevents mistakes that could lead to leaks or misalignment of your stove pipe installation.
How to Install Flashing for a Leak-Proof Seal?
Installing flashing on the roof is vital for creating a watertight seal. This step prevents water from entering your home around the chimney.
- Choose the correct type of flashing for your metal roof. There are various types, such as step flashing and continuous flashing. Each serves different roof styles.
- Measure the area around the chimney where you will install the flashing. Accuracy here ensures you cut materials to fit snugly without gaps.
- Cut the flashing material according to your measurements. Use tin snips for metal flashing to avoid bending or damaging it.
- Place the base flashing under the shingles at the bottom of your chimney first. This piece directs water away from the chimney.
- Install side flashings next, working from bottom to top so each piece overlaps properly and channels water outward.
- Add counter-flashing above these pieces by embedding them into the chimney mortar with masonry screws for stability.
- Bend any upper edges of the flashing downwards to match your roof’s pitch, ensuring a close fit against both chimney and metal roofing.
- Apply a high-quality roofing sealant along all seams and edges where flashing meets the chimney and roof to create a watertight barrier.
- Install a storm collar around the pipe just above where it exits through the flashing, then secure it with screws or clips provided in your kit.
- Seal around this collar with more roofing sealant to prevent moisture ingress between the pipe and collar.
Each step must be executed with attention to detail, ensuring that all materials fit securely and all seals are complete to maintain a leak-proof result around your wood stove chimney through a metal roof installation process.
Importance of Flashing Over the Hole
Installing the flashing to seal a hole in your metal roof is a crucial stage for the successful fitment of a wood stove chimney. This action ensures a secure barrier that blocks water from infiltrating around the pipe and potentially damaging your property.
Without accurate flashing, rainwater can effortlessly infiltrate into tiny crevices between the pipe and the roof, leading to expensive repairs later.
To effectively inhibit water leaks, the installation of the flashing should be performed correctly around the top of the hole. The procedure involves placing a component known as a pipe boot or simply ‘flashing’ on top of the chimney pipe where it exits through your roof.
This element acts like a rain shield, protecting susceptible spaces from rainwater and guiding it to the periphery of your roof for proper drainage. Securing the flashing in place securely with screws and applying sealant around its external edges are crucial steps for creating an impenetrable barrier against harsh weather.
Installing the Flashing on the Roof
Once you understand the importance of flashing over the hole, it’s time to install the flashing on your roof. This step is critical to create a watertight seal and prevent water leaks around your chimney.
- Choose the right flashing kit that matches your metal roof type and pitch.
- Measure the dimensions of your chimney pipe to ensure the flashing fits snugly.
- Cut any insulation or material away from where the flashing will sit on the roof.
- Slide the flashing over the top of your chimney pipe.
- Use roofing screws to secure the base of the flashing to your metal roof.
- Apply a bead of high-quality roofing sealant under the edges of the flashing to strengthen its hold.
- Press down firmly on all sides of the flashing for a tight fit against your metal roof.
- Install a storm collar around the chimney pipe, just above where it exits through the flashing.
- Seal between the storm collar and chimney pipe with more roofing sealant to block any path for water ingress.
- Check all sealed areas for any gaps or weak spots that might allow water through.
Taking these steps ensures that you properly install flashing on your roof, which is essential for preventing water damage and ensuring a successful installation of a wood stove chimney through a metal roof.
Sealing Around the Chimney to Prevent Water Leaks
After installing the flashing on the roof, sealing around the chimney becomes critical to prevent water leaks. Use a high-quality caulk to seal between the flashing and chimney pipe.
This step ensures that water doesn’t enter your home through any gaps.
Next, install a storm collar around the pipe, just above where it exits from the flashing. The collar serves as an additional barrier against water. Tighten it securely and seal its outer edge with caulk, too.
This double protection keeps your installation watertight under various weather conditions.
What are the Steps to Install a Stove Pipe Through the Roof?
Installing a wood stove chimney through a metal roof requires accuracy and patience. It ensures the pipe will need the right clearance around it for safety. Here’s how you can do it:
- Gather all necessary tools and materials before you start. You’ll need a drill, saw, measuring tape, and the chimney kit designed for your stove installation.
- Measure the location where the chimney will go through the roof carefully. The spot must allow for adequate clearance from any combustible materials.
- Use a drill to make a pilot hole at the center of your marked area on the metal roof.
- Enlarge this hole using a saw, cutting precisely along the lines you’ve marked.
- Assemble the first section of your chimney pipe that will fit into this hole.
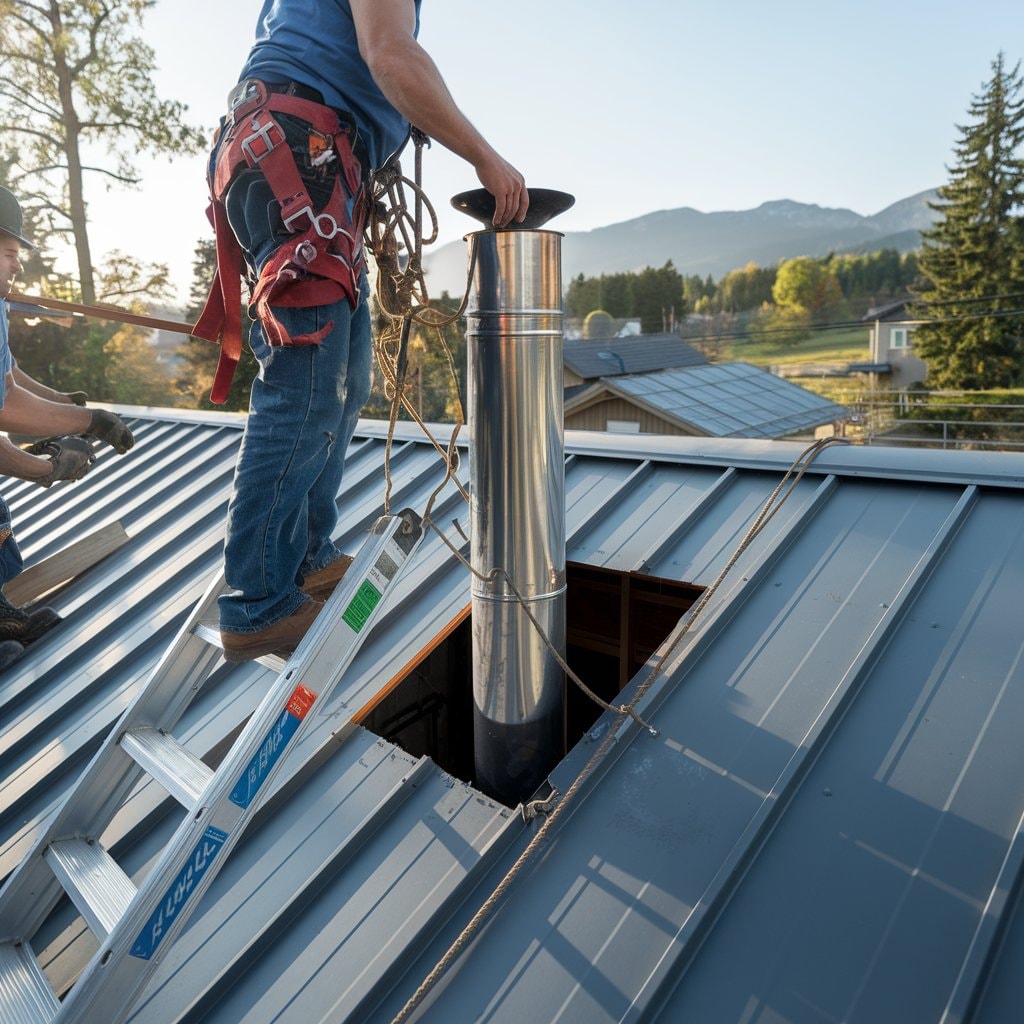
- Insert the stove pipe through the opening from inside your home, pushing it up until it emerges on top of the roof.
- Secure this section of pipe in place by attaching a roof support bracket just below where it passes through the ceiling and then again on the underside of the roof.
- Attach more sections of chimney pipe above this, ensuring each piece fits snugly with its predecessor until you reach the desired height above your roof line.
- Install flashing over the hole around the chimney on your metal roof to prevent water leakage.
- Fix the storm collar around the pipe where it exits through flashing to ensure no water can penetrate down along its sides.
- Seal all joints between pipes and around flashing with high-temperature silicone caulk to create a watertight seal.
- Finally, install a chimney cap at the top of your flue system to keep out rain and snow.
This process allows the safe venting of smoke from your wood stove through your metal roof while preventing water damage inside your home.
Positioning the Stove Pipe Through the Roof
Positioning the stove pipe through your metal roof is a key step when you install a wood stove chimney. This process allows the pipe to reach outside, ensuring smoke exits your home safely.
- Start by selecting the exact location on the roof where the stove pipe will go through. Make sure it complies with local building codes.
- Determine the pitch of your existing roof to choose an appropriate flashing and rubber boot that matches.
- Use a plumb line from the ceiling around the stove to mark where the center of the pipe will penetrate the roof.
- Drill a pilot hole from inside at this mark up through the metal roofing to indicate where to cut from outside.
- Next, climb onto the roof and find this pilot hole.
- Outline a cutting guide using chalk or a marker based on the diameter of your chimney pipe plus necessary clearance.
- Through this guide, cut out the section of metal roofing with suitable tools like nibblers or saws designed for metal work.
- After making sure all sharp edges are smooth, place a storm collar around the pipe for extra weatherproofing.
- Slide flashing over the chimney pipe down to its spot on top of your metal roof.
- Securely attach flashing to the roof using screws along the outer edges while ensuring no gaps remain between the flashing and metal roofing material.
- Apply high-temperature silicone caulk around the bases of the flashing and storm collar, sealing any potential entry points for water leaks.
Each step in positioning and securing your stove pipe must be executed with care to maintain a leak-proof system, which greatly impacts both the safety and efficiency of your wood stove’s operation.
Securing the Pipe with a Roof Support Bracket
Securing the pipe with a roof support bracket is a vital step in guaranteeing the stability and safety of your stove’s chimney. Begin by accurately aligning the pipe internally, confirming it goes through the roof at the right angle.
This particular alignment aids in keeping the top and sides of the pipe at a safe distance from any flammable materials, adhering to safety regulations. Use the support collar pieces that are included in your chimney kit for seamless installation.
The collar strengthens and maintains the pipe’s position, averting unwanted movement.
A thoroughly secured pipe provides assurance, knowing your wood stove operates safely.
After you have positioned the pipe, make the brackets around the pipe’s exterior tight against both ceiling and roof surfaces. This action hinders leakage and protects the pipe from damage due to strong winds or heavy snowfall over time.
Inspect each screw head to ensure it’s tightly against its surface for optimal hold, and install a storm collar above for extra security.
How to Ensure Safe Installation of Your Wood Stove Chimney?
Ensuring a safe installation of your wood stove chimney begins with closely inspecting the entire flue system. This step confirms that each part fits securely and functions correctly.
You must also examine the area around the chimney, looking for any combustible materials. These could pose fire risks if placed too close to the heat source. It’s crucial to keep these materials at a safe distance to prevent any accidents.
Maintaining the chimney is key for optimal performance and safety. Regular checks allow you to spot any issues early on, such as blockages or wear and tear on the chimney liner, which could impact its efficiency or even become hazardous.
Installations often require passing pipes through walls or ceilings, making it vital to secure the pipe properly inside and outside of your home. Using heat shields can protect ceiling joists and roof overhangs from high temperatures, further ensuring your setup remains safe year-round.
Inspecting the Entire Flue System
Inspecting the flue system is a crucial step to ensure safety and performance after you install the chimney through your metal roof. Start by checking that each section of the pipe inside connects securely.
This avoids any risk of smoke or gases leaking into your home. Also, make sure there’s no existing chimney blockage that could hinder airflow.
Look for any signs of wear on the outside of the pipe, including gaps where it passes through the ceiling and the roof. Fitting a storm collar properly helps shield these areas from water damage.
Regular inspections will catch potential issues early, keeping your stove safe to use throughout its life.
Checking for Combustible Materials Around the Chimney
Ensuring there are no combustible materials around the chimney is crucial for safety. Always check the space where the pipe passes through to identify any items that could catch fire.
These include paper, wood, certain types of insulation, and even everyday household clutter that might have been stored nearby. The proximity of flammable substances to a hot chimney can quickly lead to dangerous situations.
A safe distance between your stove and any combustibles greatly reduces the risk of fire in your home.
Builders and contractors recommend maintaining at least a meter’s clearance from the chimney to prevent fires. This advice applies whether you’re installing a new stove in your home or checking an existing setup for safety.
Regular inspections help spot potential hazards early, ensuring peace of mind for homeowners and decorators alike.
Maintaining the Chimney for Optimal Performance
Maintaining your chimney ensures it performs well and lasts longer. Here are some steps to keep your chimney in top condition:
- Check the chimney regularly for any signs of wear or damage. This includes looking for loose bricks, cracks in the mortar, or rust on the metal parts.
- Clean the flue at least once a year. The build-up of soot and tar can lead to dangerous blockages.
- Inspect the cap or cowl at the top of your chimney. It should be secure and free of damage to prevent water and debris from getting inside.
- Make sure there is no buildup around the screw heads that hold your chimney together, as this can lead to leaks or drafts.
- Replace any damaged parts as soon as possible. This might include sections of the pipe, storm collars, or flashing.
- Keep trees trimmed back from your chimney to prevent branches from damaging or obstructing airflow.
- Monitor for any unusual signs when using your stove, such as smoke entering the room, which could indicate a problem with air flow or blockage in the chimney.
- Use only recommended fuels for your wood stove to prevent excessive soot accumulation.
- Place a carbon monoxide detector near your stove as an added safety measure.
- It is advisable to have a professional inspection every few years, particularly if you notice changes in heating efficiency or after severe weather conditions that could have damaged your chimney.
Next, let’s explore how regular inspections contribute to long-term durability and safety.
Conclusion
Mounting a chimney through a metal roof might appear overwhelming initially. Yet, with the correct tools and guidance, homeowners, decorators, builders, and contractors can accomplish it effortlessly.
The procedure necessitates detailed planning, from selecting the correct chimney kit to cutting the slot for your wood stove chimney. Appropriate installation makes sure your home remains safe and devoid of leaks.
To keep your chimney working at its best, inspect the flue system regularly and keep flammable materials at bay. Following these steps, the installation of flashing for a leak-proof seal becomes straightforward.
Always fit the storm collar accurately on sloped or flat roofs to avert water damage. This method enhances security and assures that your wood stove’s heating system lasts long in any room – be it a comfy living room or a practical garage.


