

Need help with water damage around your home? It might be time to look at how to install roof gutters. Proper gutter installation is key to directing rainwater away from your house, keeping it safe and dry.
Here’s a fact: installing new gutters can greatly improve your home’s drainage system, reducing the risk of water damage. In this blog, we’ll guide you through each step of fitting new gutters and downspouts for efficient rainwater flow.
From choosing the right type of gutter for your house to securing everything in place, we’ve got you covered.
Ready to protect your home? Let’s get started.
How to Install Rain Gutters on Your Roof?
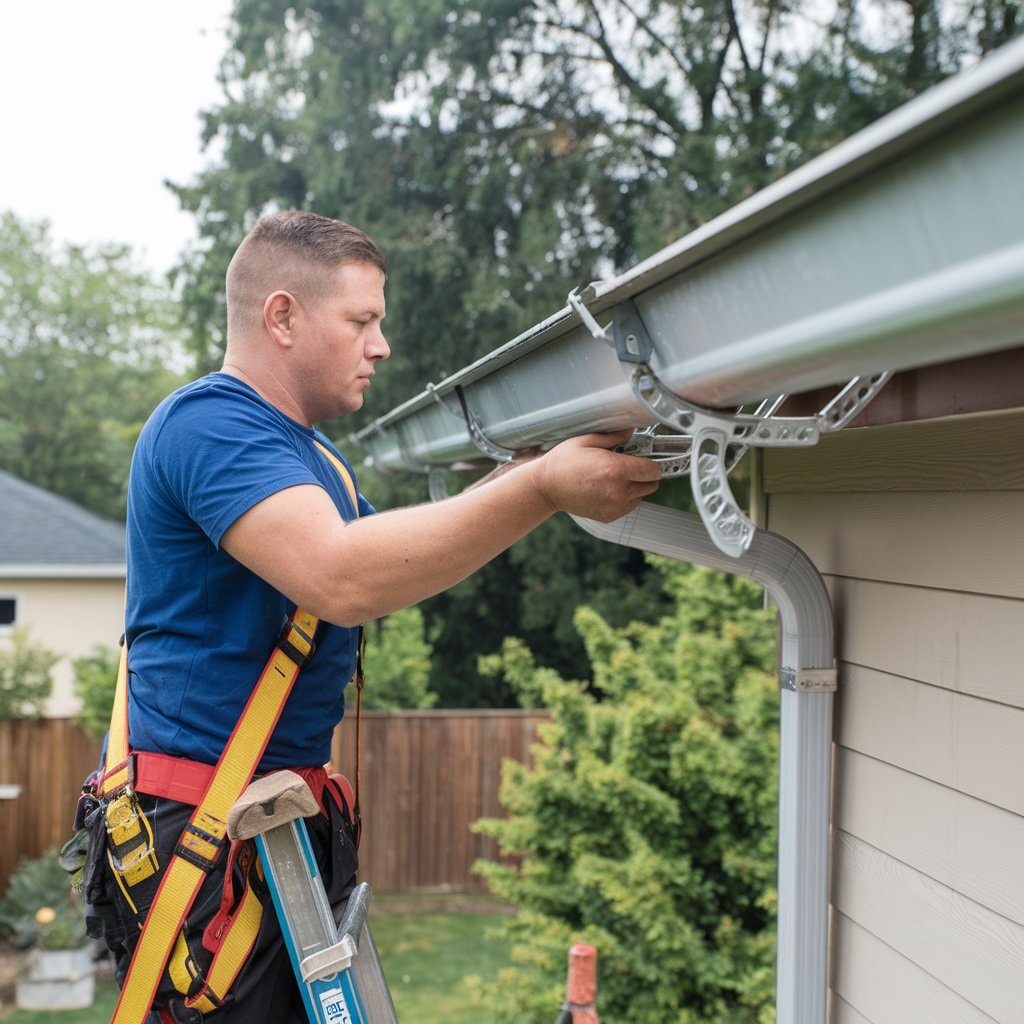
Installing rain gutters on your roof is essential to protect your home from water damage. This guide offers a simple method for installing gutters and downspouts efficiently.
- Measure the length of the gutter along the edge of your roof where you plan to install the rain gutters. This ensures you buy enough material without waste.
- Choose the type of gutter material; aluminum gutters, vinyl gutters, and steel gutters are popular options because of their longevity and simplicity of installation.
- Calculate the slope needed for proper drainage, which is typically a fall of 1 centimeter for every 3.5 meters of gutter.
- Mark the highest point of the gutter run on one end of the fascia board, ensuring it’s close to but not at the very end.
- Install fascia brackets starting from the highest point and space them about every 60 centimeters along the fascia.
- Cut gutter sections to size using tin snips or a hacksaw for metal gutters, ensuring you have precise measurements for a snug fit.
- Assemble gutter sections on the ground by fitting them into each other and securing them with rivets or screws as recommended by the manufacturer.
- Apply silicone sealant at joints between sections to prevent leaks.
- Lift assembled gutter sections carefully onto brackets and lock them in place as per the instructions provided with your specific type of bracket.
- Install drop outlets at locations marked for downspouts, securing them with screws or rivets as necessary.
- Attach downspout elbows at both ends of each outlet, then measure and cut downspout sections to span from the roofline to just above ground level or into a rainwater tank if desired.
- Connect downspout sections using pipe clips or socket joins, ensuring they fit tightly together without gaps for potential leaks.
Now that you know how to install gutters, let’s look into what parts are necessary for this process
Preparing the Roof and Measuring the Fascia
Correct installation of rain gutters commences with comprehensive groundwork. This involves sanitizing the roof edge and accurately gauging the fascia for the impending gutter attachments.
- Clear any debris from the roof edge. Leaves, soil, and small branches could obstruct the new gutters.
- Inspect the fascia for signs of degradation. Any decayed wood should be substituted prior to the installation of new gutters.
- Gauge the length of the fascia along each side of the roof where gutters will be required.
- Confirm the downspout positioning. Every section exceeding 12 meters ought to have one.
- Signal every 3 meters along the fascia to strategize bracket positioning.
- Confirm ladder or scaffolding availability for secure reach to the roof’s edge.
- Utilize a spirit level to identify the lowest point of each gutter run to ensure efficient water drainage.
- Compute a subtle tilt in the direction of each downspout location; a standard 2cm decline for every 12m length of gutter guarantees an unobstructed water course away from the property.
- Select gutter components: corners, end caps, brackets, and downspout sections need to be consistent with the selected gutter material, such as aluminum, vinyl, or stainless steel.
- Ready your tools: Drill, screws, sealant, hammer, chisel, pencil for marking, and a saw for re-sizing gutter sections if necessary may be required.
This groundwork aids in ensuring that when you fix your gutters, they will proficiently deal with rainwater and guard your home against potential water damage.
Steps to Install Gutters and Downspouts
When it comes to putting gutters and downspouts in place properly, it’s critical to manage rainwater effectively away from your property. Observe these steps for optimal rainwater direction and to safeguard your premises.
- Assess the length of the rooftop edge where you intend to fix the gutter. This helps to calculate the amount of guttering necessary.
- Buy sufficient parts of the gutter, bracing, downpipe clips, gutter seals, pipe sockets, and screws from a home center.
- Start at the lower end of the gutter path. Identify this leading spot slightly lower than the remaining gutter line to facilitate water movement in that direction,
- At every 10-foot distance along the fascia board, set out some spots to fix the fascia braces that connect gutters to the fascia.
- Create pilot holes in the fascia board at the identified spots for the braces, ensuring they align correctly.
- Securely fit braces in position, having them ready to accommodate the gutter sections.
- Trim the gutter sections to the calculated lengths using a fine-toothed saw if required.
- Affix end caps on each chunk of the gutter using rivets or screws and apply gutter sealant within cap edges to prevent leakage.
- Slot each section of the gutter into its respective brace, commencing from one end.
- Rotate each portion until it locks securely under the clamp of the brace.
- Make sure all portions merge accurately at seams; use sealant or specialized connectors as needed to achieve a water-resistant seal.
- Assess and crop downspout lengths that extend from the outlet at the bottom of gutters to slightly above ground level or into a drainage setup.
- Mount downspout clips at regular intervals along the wall leading downwards from the gutters to hold downpipes against siding or masonry.
- Place a union brace at the joint between two sections of the gutter if your route is more than 40 feet to add stability.
- Once installed, test the entire system by pouring water into the top end and observing the flow; tweak the slope if there’s water accumulation instead of outflow.
Following these steps, we will discuss how to choose materials that balance budget requirements and aesthetic preferences for your new gutter system.
Ensuring Proper Slope and Drainage
Appropriate gradient and drainage are integral to successful gutter placement. The gutters necessitate a minor gradient directed to the downspouts for water to traverse seamlessly.
The majority of professionals suggest a gradient of 1 centimeter for every 3.5 meters of guttering. This guarantees swift rainwater transference away from your abode, minimizing the probability of water damage or issues with the foundation.
Precise measurements are vital prior to the gutter section placement. You are required to adjust the gutter upward at the low extreme to examine if water will drain effectively to the downspout.
Placement of a gutter outlet here ensures rainwater’s proficient exit into the downspout, shielding your home’s structure.
Now, we can examine the essential components for accurate gutter placement.

What are the Necessary Gutter Parts for Installation?
Installing gutters requires specific parts to ensure they function correctly. Homeowners and builders must get familiar with these essential components. Gutters themselves come in various types, such as aluminum gutters, vinyl, and seamless gutters.
Each type has its benefits and suits different preferences for rainwater flow management.
For a successful installation, you will need sections of gutter that link together at the corners of the house. Brackets secure the gutter to the fascia board on the edge of the roof.
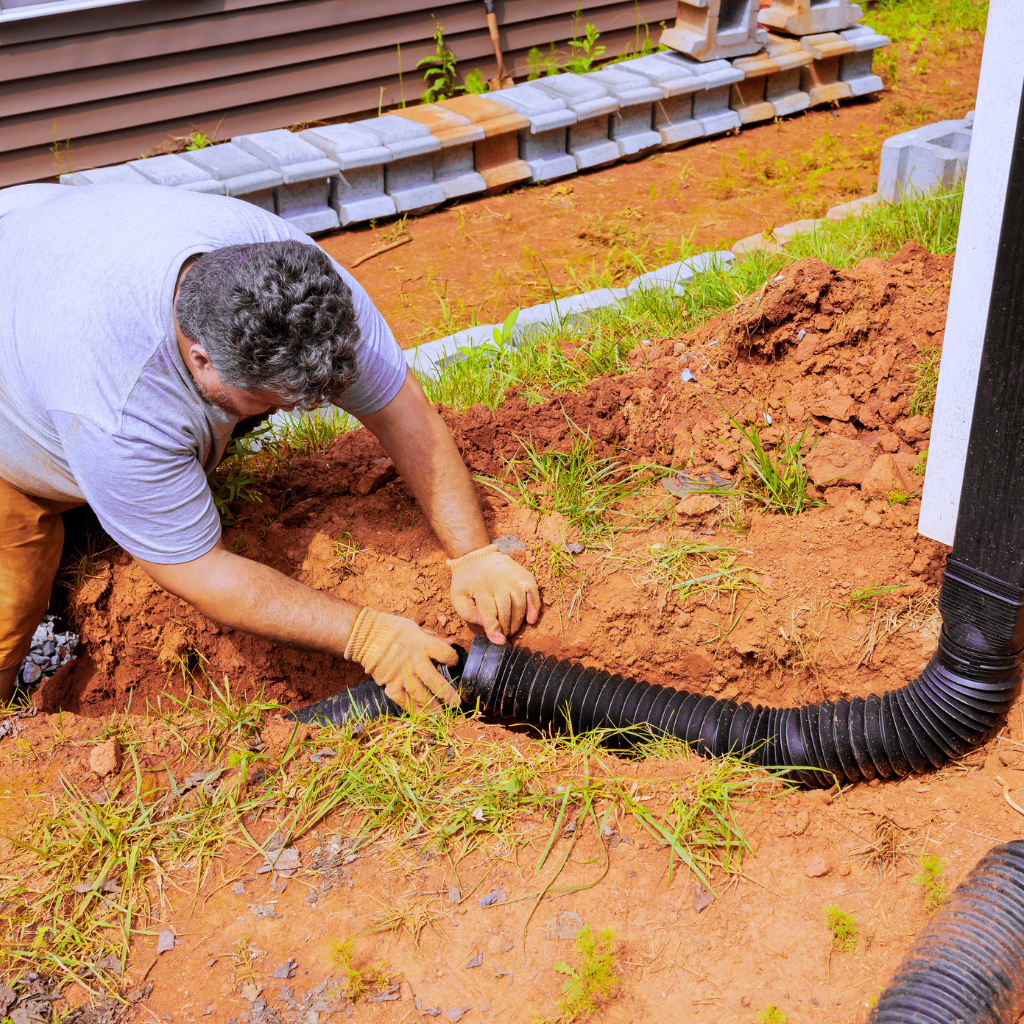
Downspouts attach to the end of the gutter run, guiding water away from your home’s foundation. Gutter guards can also be an important addition to preventing blockages caused by leaves or other debris.
Choosing high-quality screws and sealants helps maintain a durable connection between gutter pieces and ensures leak-free performance over time.
Understanding Different Types of Gutters
Gutters come in various materials, like aluminum, vinyl, and cast iron. Each type suits different needs and budgets. Aluminum gutters are lightweight, easy to install, and resist rust.
Vinyl gutters offer a low-cost option with easy installation but may not withstand extreme weather as well as other materials. Cast iron gutters, found often in older or more traditional homes in the United Kingdom, provide durability and a classic look but require regular maintenance to prevent rust.
Choosing the right gutter involves considering the climate you live in and the style of your home. For those living in areas with heavy rainfalls, opting for larger capacity gutters might be wise to ensure proper rainwater flow away from the house.
Decorators looking for an aesthetic match can find choices ranging from stylish modern designs to intricate traditional ones. Profiles that fit union brackets seamlessly into existing architecture.
Builders often recommend fitting gutter guards alongside new installations to minimize blockages by leaves and debris, ensuring the longevity of your gutters without frequent cleaning.
Essential Gutter Parts and Tools Needed
The process of installing gutters necessitates the use of specific components and equipment. This guide supplies the necessary items for an efficient installation.
- Gutters: Select from aluminum, vinyl, or steel to complement your home’s requirements. Aluminum gutters have gained popularity due to their long-lasting nature.
- Downspouts: These facilitate the movement of water away from your home’s foundation. Make sure they correspond to the size of your gutters.
- Fascia Brackets: Fasten these brackets to the fascia board every 10 feet along the roof’s border.
- Gutter Hangers: These fix the gutter to the fascia and aid in preserving its contour, preventing sagging over time.
- End Caps: Close the ends of the gutter sections to avoid leakage.
- Corner Joints: Assemble two gutter sections at an angle, ensuring a seamless turn around corners.
- Sealant: A superior quality gutter sealant averts leaks at joints and connections.
- Screws and Nuts: Employ sheet metal screws for firm attachments, crucial in areas prone to wind.
- Tape Measure: Precise measurements are vital for an exact fit and to prevent excess.
- Level: Verify your gutters incline correctly to downspouts for effective disposal.
- Hack Saw or Tin Snips: For trimming gutter sections to length, depending on material type.
- Rivet Gun and Rivets: Employed for linking aluminium gutter sections together securely without any gaps.
- Ladder: Safe reach to your roofline is required during installation.
Selecting from aluminum, vinyl, and steel gutters prepares you for the upcoming decision phase in your installation project.
Choosing Between Aluminum, Vinyl, and Steel Gutters
After selecting the necessary gutter parts and tools, homeowners must decide on the material for their gutters. Choices typically include aluminum, vinyl, and steel gutters. Each material provides unique benefits based on the homeowner’s needs and environmental conditions.
Aluminum gutters are lightweight and resistant to corrosion, making them a popular choice for many. They can last over 20 years if properly maintained. Vinyl gutters stand out for their ease of installation and affordability but might not hold up in extremely cold weather as well as other options do.
Steel gutters offer durability that surpasses both aluminum and vinyl options. They can withstand heavy snowfall, strong winds, or any harsh weather conditions exceptionally well.
However, steel options are often more expensive and require professional installation due to their weight.
Choosing between aluminum, vinyl, and steel gutters boils down to weighing cost against durability.
How to Secure the Gutter and Downspout System?
Securing the gutter and downspout system is crucial for managing rainwater flow efficiently. Proper installation shields your home’s foundation and siding from water damage.
- Ascertain the length of the fascia to determine the quantity of guttering required. This ensures an optimal purchase of materials, avoiding waste.
- Opt for aluminum gutters for a durable, rust-resistant solution. They are light and straightforward to manipulate.
- Mount fascia brackets at consistent intervals along the fascia board. This creates a firm foundation for the gutters.
- Trim the gutter sections to the assessed lengths utilizing a fine-toothed saw. Use a file to smooth any pointed edges to avert injuries.
- Situate each section of the gutter into the affixed fascia brackets, ensuring a secure fit. This step is vital for a steadfast gutter system.
- Apply a sealant at the joints between gutter segments to dodge leaks. Consistently apply a silicone-based sealant fit for outdoor use.
- Install end caps on sections with open ends by snapping them into place or fastening them with rivets and sealant, as per your gutter type.
- Guarantee a mild slope in the direction of downspouts for free water flow, preventing water stagnation in the gutters.
- Secure downspouts to the lower end of the gutter using screws or rivets, ensuring a tight fit without spaces.
- Link elbow joints at the top and bottom of downspouts if necessary, directing water away from your house’s foundation.
Shifting seamlessly from fitting methods and gaining an understanding of typical challenges will prepare homeowners and builders for successful undertakings.
Using Brackets and Screws for Stability
Using brackets and screws ensures your gutters stay firmly attached to the fascia. You must select the right type of bracket for your gutter material, be it aluminum, vinyl, or steel.
Fitting the gutter into the fascia brackets involves drilling pilot holes into the fascia board at predetermined intervals. This helps to avoid splitting the wood when screws in the brackets.
For a standard installation, space brackets about 60 centimeters apart along the entire length of the gutter.
Next, secure each section of the gutter with screws through these brackets. Make sure you turn each screw tightly so that the edge of the gutter sits flush against the fascia. This process is critical for stabilizing long sections and preventing sag over time.
As a rule of thumb, use rust-resistant screws to prevent future damage caused by weather conditions.
Now let’s move to attaching the gutter to the fascia board directly below your roofline.
Attaching the Gutter to the Fascia Board
After securing the gutter with brackets and screws, the focus shifts to attaching the gutter to the fascia board. The process begins by aligning the top of the gutter with the previously marked lines on your fascia.
This ensures that each section fits exactly as planned. You’ll need to hold each piece of gutter firmly against the fascia and drill through both the gutter and into the fascia board using a durable screw at every pre-marked point.
Secure attachment is vital for long-lasting rain gutters.
It’s crucial to maintain steady pressure while screwing in, to avoid any gaps or misalignment. For longer than 40 feet sections, where two pieces of gutter join, use a union bracket for added support ensuring there’s no leakage at joints.
Silicone sealant may be applied inside joint areas for waterproofing. With precise measurements and careful execution, Your gutters will effectively redirect water away from your home.
Connecting Gutter Sections and Sealing Joints
To connect gutter sections, you need to cut the sections to their measured length. Fit a union bracket at each joint between two sections of the gutter. This guarantees a tight fit and stops water from leaking through the joints.
Use screws to attach these brackets firmly, making sure each piece is tightly connected.
Sealing joints is crucial for preventing leaks. Apply gutter sealant on the inside of the gutter where two ends meet before fitting them together. For areas prone to heavy rain, consider using an additional layer of sealant outside the joint for extra protection.
This method keeps your gutters watertight during harsh weather, ensuring effective rainwater flow away from your home’s foundation.
What are the Common Challenges in Gutter Installation?
Handling extended gutter runs presents a notable issue during installation. The longer the gutter, the more challenging it is to keep a suitable slope for efficient drainage. This calls for accurate measurement and planning to confirm that rainwater flows in the direction of the downspouts without accumulation.
Moreover, adjusting guttering around corners calls for special focus to prevent leaks. Installers often utilize offset bends and cut sections carefully to nestle against the home’s architecture.
Managing fascia and siding adjustments also emerge as demanding. Some homes may have uneven or damaged fascia boards that need fixing before fitting gutters. In such instances, assuring gutters align properly with the roof’s edge calls for supplemental caution.
Gutter sealant is vital in averting leaks at joints and seams; however, applying it too sparingly or liberally can cause troubles later on.
Proceeding, let’s examine how regular upkeep and replacement contribute to maintaining your gutters in the best working condition.
Handling Long Gutter Runs and Angles
Dealing with long gutter runs demands a strategic approach to maintaining effective rainwater flow. To manage these lengths, it’s essential to use multiple downspouts. This ensures that water exits the system quickly, preventing overflow and potential damage to your property’s foundation.
For optimal performance, position downspouts at both ends of the run and any peak exceeding 12 meters in length. The correct placement aids in evenly distributing water flow, reducing stress on any single part of the guttering.
Addressing angles in gutters requires careful measuring and cutting to ensure pieces fit snugly together without gaps where leaks could form. Using a plumb bob or level helps achieve precise angles for corners or turns along the roofline.
Securing joints by fitting gutter sections into brackets firmly before sealing them with a high-quality sealant prevents leaks. Applying lubricant can ease installation, but make sure it doesn’t compromise the sealant’s effectiveness.
By focusing on these aspects, you safeguard your home against water damage effectively.
Dealing with Fascia and Siding Adjustments
Tackling the difficulties of extended gutter runs and angles, it is crucial to focus on the adjustments of fascia and siding. These aspects are of utmost importance for a successful gutter installation.
Should fascia boards not level or show significant wear, you might need to adjust them. This allows the gutter brackets you attach to provide solid support for the entire length of the gutter run.
For homes with vinyl or aluminum siding, careful removal or trimming may be required to fit new gutters snugly against the roofline.
Gutters that need to fit around corners or where sections join need precise cuts and secure fastening to prevent leaks. Use the sealant and screws recommended for your chosen type of gutters – aluminum, vinyl, or steel – to effectively complete these connections.
This step ensures that rainwater flows smoothly to downspouts without spilling over sides or through poorly sealed joints. A regular inspection after installation can identify any issues early, maintaining your home’s exterior in top condition.
Preventing Leaks with Gutter Sealant
Preventing leaks in your gutter system is crucial for protecting your home from water damage. Gutter sealant plays a vital role in this process, acting as a barrier to stop water from escaping through joints and seams.
You should apply it where the gutter sections join together or at any end caps and corners. A good quality polyvinyl chloride (PVC) sealant ensures that all parts of the gutter fit snugly together, preventing any potential leaks.
A well-applied gutter sealant can save homeowners significant costs in repairs by effectively keeping rainwater flowing smoothly through the gutters and downspouts.
Experts recommend checking the sealant annually as part of regular gutter maintenance. Over time, extreme weather conditions can cause it to crack or shrink. Reapplying sealant when necessary helps maintain the integrity of your entire rainwater drainage system, ensuring peace of mind during heavy rains.
This simple step keeps your gutters functioning properly for years, safeguarding your property against moisture-related issues.
How to Maintain and Replace Gutters?
Maintaining and replacing gutters are vital tasks to keep your home safe from water damage. Correct maintenance stops leaks and blockages and ensures rainwater is efficiently taken from your property.
- Examine your gutters at least two times a year, in spring and autumn. Search for indications of wear, sagging, or blockage.
- Clean gutters and downspouts often to discard leaves, twigs, and debris. This enables rainwater to move freely.
- Be alert for rust on metallic gutters like aluminum gutters. Rust suggests the need for considering gutter replacement.
- Fasten any loose brackets that join the gutter to the fascia board. Tighten screws if needed.
- Join sections of gutters with gutter sealant to avert leaks.
- Replace harmed or broken components immediately to prevent larger issues in the future.
- If your residence is in a region with abundant rain or numerous trees, install gutter guards for defence against blockages.
- Periodically determine the inclination of your gutters; they should have a minor angle for the downspout for correct drainage.
- Keep an eye for water marks beneath the gutters as they denote overflow or leaks requiring attention.
- Inspect the fascia boards for rot or damage, as this can affect the stability of your guttering system.
- For homes with over 30 feet of gutter run, make sure enough downspouts are available to manage the water flow.
- Contemplate gutter replacement if they have been around for more than 20 years or are extensively damaged – contemporary models offer superior efficiency and durability.
Retaining your home’s gutter system in good condition is simple but requires consistent attention to avoid serious complications brought about by water damage.
Regular Gutter Cleaning and Inspection
Keeping your gutters clean is vital to protect your home from water damage. Gutters can accumulate leaves over time, debris, and even nests which can block the flow of rainwater.
This blockage forces water to overflow and potentially damages the roof, fascia architecture, and the foundations of your house. Homeowners should clear their gutters at least twice a year: once in early spring and again in late autumn.
Routine inspections are also essential in maintaining gutter health. Inspecting for signs of damage, such as rust on metal components like aluminum gutters or cracks in plastic parts, helps identify issues before they escalate.
For those living in areas prone to heavy rainfall or storms, inspecting gutters after such events is crucial to ensure everything is intact and functioning correctly. If you spot any problems during these checks, acting swiftly could save you from costly repairs down the line.
When to Consider Gutter Replacement
Gutters are key in protecting your home from water damage. Homeowners, decorators, builders, and contractors should consider gutter replacement if they spot rust, holes, or cracks in the existing guttering system.
These signs indicate that the gutters may no longer be able to efficiently channel water away from your property. Leaks at joints or where the gutter sections connect are also red flags.
If you live in an area with heavy rainfall or snowfall, these issues can lead to significant problems for the roof and fascia (architecture).
Replacing old gutters is essential when they start sagging or pulling away from the house because this compromises their functionality. Over time, brackets (architecture) that hold the gutter to the bracket may loosen due to weather exposure or weight strain during heavy rains.
Home improvement projects often include updating rain Gutters and downspouts are essential for maintaining proper drainage around your home’s foundation. Homeowners wanting to install new gutters should choose sizes and materials—like aluminum, vinyl, or steel—that suit their budget and local climate conditions while meeting their aesthetic preferences for home décor.
Installing Gutter Guards for Protection
After you’ve considered gutter replacement, think about adding gutter guards to protect your new system. Installing gutter guards stops leaves and debris from blocking your gutters.
This means less cleaning and longer-lasting gutters. They are easy to fit on top of the existing setup.
Gutter guards come in various materials, such as aluminum and vinyl, which are both available at home centers. You may want to choose a type that matches your new gutter for a seamless look.
They easily clip onto the fascia brackets that you attached earlier or slide under the roof shingles, providing an effective barrier against blockages.
Conclusion
Installing proper guttering in your home is vital for preventing water damage. Utilise brackets and screws to mount gutters firmly on the fascia board. Make sure every portion of the gutter aligns perfectly with the next, using sealant to avoid leaks.
Consider gutter guards to exclude debris and lessen the need for frequent maintenance.
Selecting a suitable gutter type, be it aluminum, vinyl, or steel, hinges on your financial plan and the climate conditions in your region. Position gutters at the right gradient for optimal rainwater transportation.
Always inspect and cleanse gutters to stave off clogs that might cause overflow.


