

To replace gutters, begin by removing old gutters and inspecting the fascia. Use correct tools like a power drill and level to guarantee proper alignment and secure attachment of new gutters, maintaining a slight slope for efficient drainage. Regularly clearing blockages and inspecting for damage helps keep the system’s functionality. For further detailed steps on gutter installation and tips to optimize the process, exploring an exhaustive guide can provide valuable insight into enhancing your home’s gutter system.
What Are the Signs You Need to Replace Your Gutters?
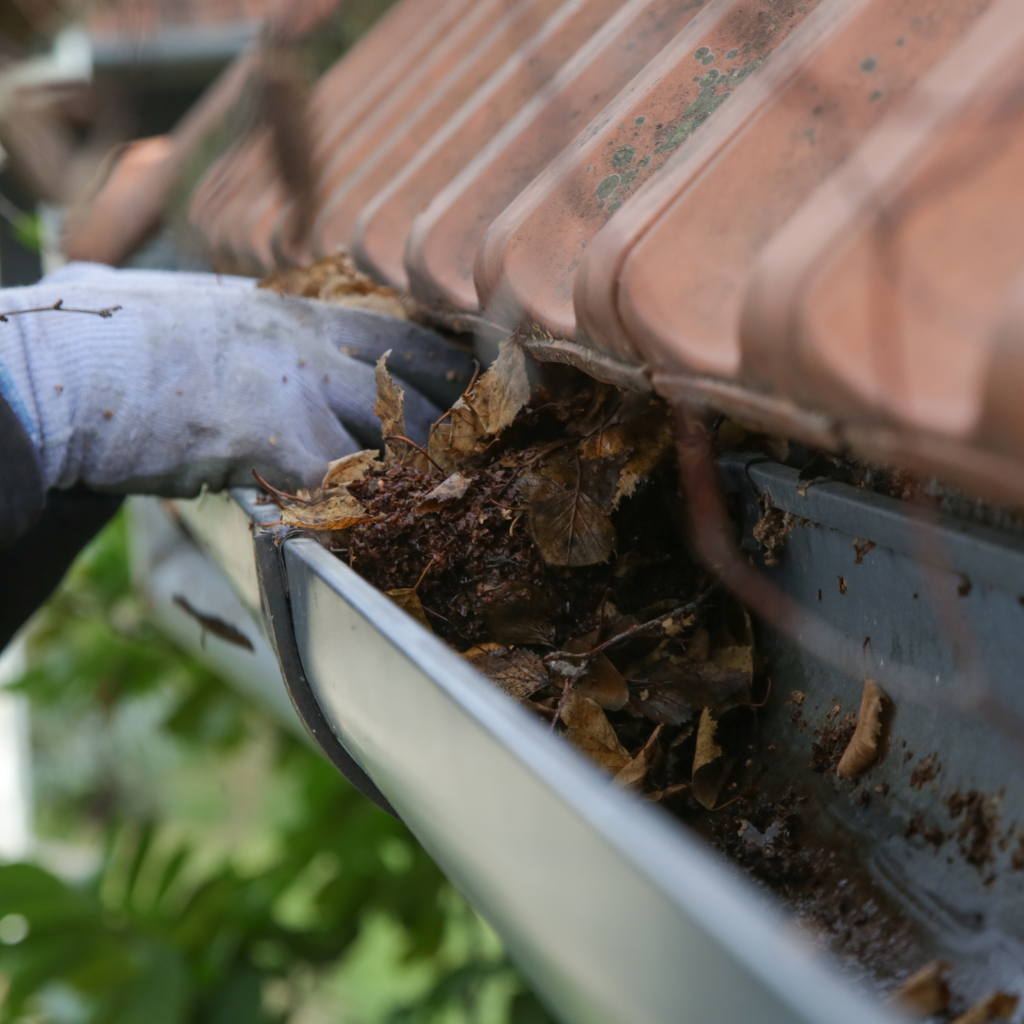
Recognizing the need for gutter replacement often starts with visible signs of damage, such as cracks, sagging, or detachment.
Homeowners should consider the timing of replacing their gutters to prevent potential water damage and structural issues.
Understanding why timely gutter replacement is essential can save substantial costs and prevent further property damage.
Identifying Gutter Damage
Many homeowners may overlook the subtle signs that indicate the need for gutter replacement, yet these indicators are vital for maintaining the integrity of a home’s structure.
Rust on existing guttering, for instance, can significantly compromise the system’s efficiency and might necessitate a gutter replacement project.
Leaking, often due to failed gutter sealant or improper fitting of the section of guttering, leads to water penetration and inadequate drainage.
This persistent moisture can damage the fascia boards, prompting repairs or complete guttering replacement.
Observing these signs early can save homeowners from more extensive and costly damages, making it essential to act promptly when these issues are detected in the gutter system.
Why Gutter Replacement is Important
Gutter replacement is essential when the current system fails to protect a home from water damage effectively.
Recognizing when to install gutters anew can save on costly repairs. Here are some key indicators:
- Visible Damage: Broken fittings or cracks in the rain gutter impede proper water flow, necessitating immediate attention.
- Water Marks or Rot: Persistent dampness or signs of rot around or beneath the gutters indicate that they are not draining effectively and are likely misaligned or obstructed by debris.
- Overflow and Sagging: If, during rain, water spills over the sides instead of flowing through the designated drain channels, it’s time to measure and plan for gutter installation to guarantee peak performance and protection.
What Are the Steps in the Gutter Replacement Process?
Replacing gutters involves several critical steps to guarantee proper installation and function.
Initially, one must prepare the area by safely removing old gutters and fascia brackets.
The new guttering can be installed, ensuring proper fixing holes are utilized for secure attachment.
Preparing for Gutter Replacement
Before initiating the replacement of your home’s gutters, it is crucial to undertake a series of preparatory steps to guarantee the process is smooth and effective.
- Assess the Roof and Fascia: Inspect the roof edges and fascia boards for any signs of damage or rot. This helps determine the extent of repairs needed before installing new gutters.
- Set Up Access Equipment: Position ladders or scaffolding safely around the house to guarantee easy and secure access to the roof.
- Prepare Installation Tools: Gather all necessary tools, including a spirit level, drill for pilot holes, screws, and brackets.
Check the alignment of existing downpipes to guarantee new gutters will connect appropriately with minimal adjustments.
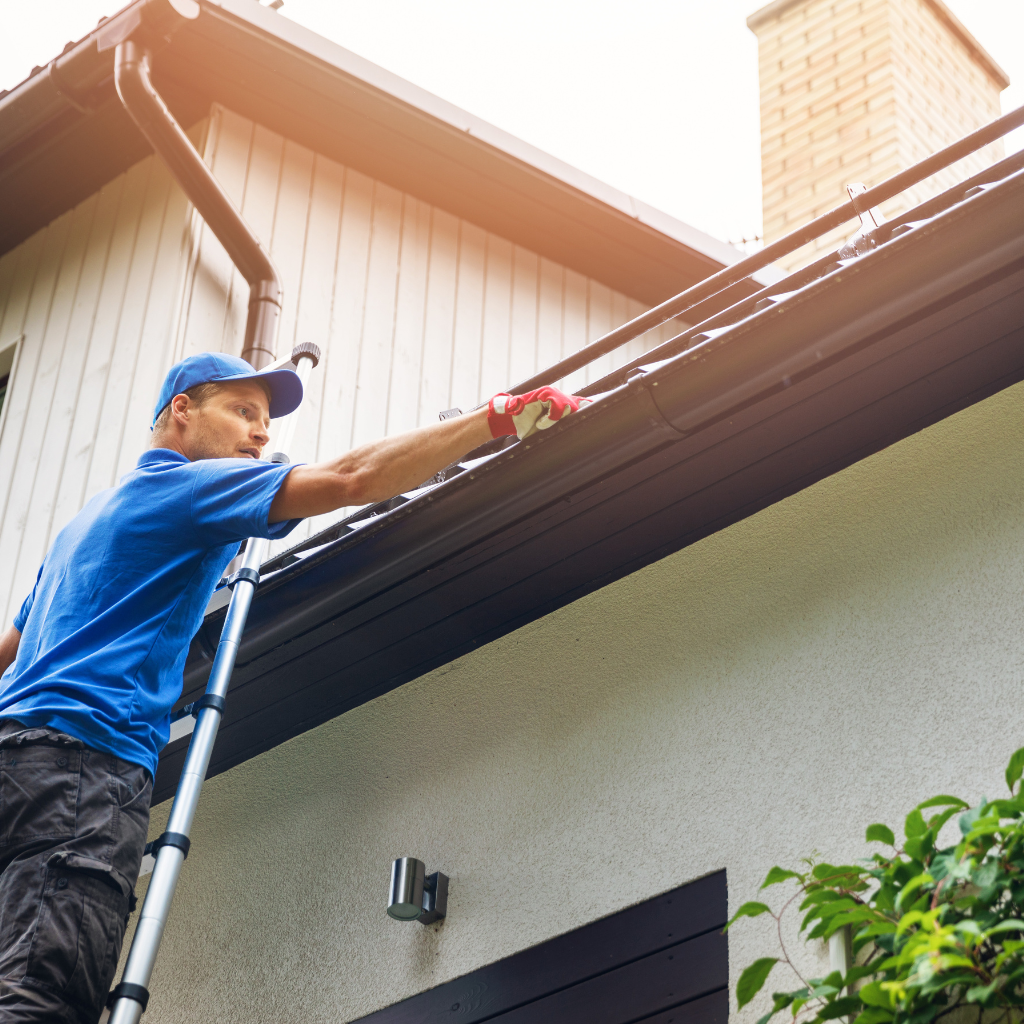
How to Remove Old Guttering and Fascia Brackets
Having prepared the necessary tools and guaranteed safe access, the next step involves the removal of the old guttering and fascia brackets.
Position a ladder securely against the guttering. Start by detaching the downpipe clip and using pincers to remove the pipe nails that secure the first length of the gutter.
Carefully lift away the first length, then proceed to unclip the gutter from its position, working systematically along the fascia board beneath.
Remove each gutter and fascia bracket by unscrewing or prying out the fasteners.
Verify all pieces are safely lowered to the ground to avoid damage to property or injury.
This methodical removal ensures the area is clear for new installation without residual fixtures.
Installing New Guttering with Proper Fixing Holes
Once the old guttering has been removed, installing new gutters can begin by marking the correct placement for fixing holes. Precision is essential to guarantee a seamless gutter installation that promotes proper drainage and structural integrity.
- Measure and Mark: Start by measuring the length of the roof edge to determine the positioning of the gutter runs. Use a chalk line to mark where the top of the gutter will align, guaranteeing a slight slope towards the downpipe for adequate water flow.
- Drill Fixing Holes: At the marked points, drill holes for the fascia brackets that will attach and support the guttering. Ensure that these are evenly spaced and aligned.
- Attach Brackets: Secure the fascia brackets into the fixing holes, checking their alignment. Once in place, the gutter sections can be clipped into these brackets, connecting seamlessly with the downpipe, flashing, and gutter.
How to Install Gutters on Your Own?
Installing gutters alone can be a rewarding DIY project if approached with the right tools and techniques.
The process begins with gathering essential tools and understanding the step-by-step procedure for secure installation, including the critical placement of a running outlet.
Additionally, adhering to specific tips can guarantee the gutters function effectively, preventing future issues related to water damage.
Essential Tools for DIY Gutter Installation
Starting a DIY gutter installation project requires specific tools to guarantee a smooth and effective process.
Essential implements include:
- Tape Measure and Marker: Before you begin, measure the length of the gutter run and mark the position on the fascia where each section will fit. This affirms that the gutters align correctly with the roof’s edge and allows for precise placement of gutter joints and outlets.
- Power Drill and Screws: Essential for attaching the gutter to the fascia firmly. The drill should be used to pre-drill holes for screws, reducing the risk of damaging the material.
- Level: It is vital to confirm that each gutter section is installed at the correct angle to facilitate proper water flow.
Step-by-Step Guide to Install Gutters and Running Outlet Installation
Begin the installation of gutters by positioning the first section at one end of the fascia, ensuring it is level before securing it with screws.
When installing gutters, start from the gutter end and work towards the opposite end of the gutter run. Connect each piece of the first length, allowing for joint expansion.
Fit a gutter by ensuring the edge of the gutter aligns with the outer edge of the fascia. Install a running outlet near the end of the gutter run, positioning it above the planned location for the downspout.
This setup facilitates efficient water flow from the roof, through the gutters, and into the downspouts, effectively replacing gutters that may be aging or damaged.
Tips for Ensuring Proper Gutter Installation
Guaranteeing a successful gutter installation when tackling the project independently begins with precise planning and the proper tools. Here are key steps to ensure the gutter is installed correctly:
- Guarantee Alignment: Start by securing the gutter to fit at the top of the fascia board. Guarantee that the joints line up and the gutter maintains a slight slope towards the low end for proper drainage.
- Spacing Brackets: Install back clips at the end of the fascia, maintaining a distance between the gutter brackets of no more than every 6m to support weight and prevent sagging.
- Check Verticality: Use a level to guarantee that the vertical line from the back clip to the low end of the gutter is straight, avoiding any improper tilt that could affect functionality.
What Are the Costs to Replace Gutters?
The costs can vary considerably when considering gutter replacement based on several factors.
Homeowners should prepare a budget for different expenses associated with either DIY or professional installation approaches.
Comparing these costs can help make an informed decision that aligns with financial constraints and preferred outcomes.
Factors Affecting the Cost of Gutter Replacement
Several factors influence the cost of gutter replacement, creating a range of potential expenses for homeowners.
- Material Type: The choice of material dramatically affects pricing. Options like plastic guttering and aluminum gutters are generally more affordable and easy to install, whereas steel gutters and cast iron are pricier due to their durability and aesthetic appeal.
- Size and Scope: The length and complexity of the gutter system, including the number of stories and roof accessibility, impact costs. Longer gutter runs, and additional features like gutters and downpipes increase expenses.
- Installation: Professional installation varies in cost depending on the region and the difficulty of the job. Rain gutters and downspouts that are intricate or challenging to access may require higher labor costs.
Budgeting for Your Gutter Replacement Project
Understanding the various factors affecting gutter replacement costs prepares homeowners to establish a realistic project budget.
The price of replacing gutters can vary significantly based on the length required and the type of gutters chosen. Materials like aluminum or vinyl are commonly available at home centers and vary in cost.
Additional components, such as clips and bolts or specialty paint to match your home, also contribute to the overall expense. Budgeting wisely means considering all these elements.
Homeowners should take their time to research and compare different options to keep their homes protected without overspending.
Planning and purchasing materials during sales can help manage costs effectively.
Cost Comparison: DIY vs Professional Installation
Why choose between DIY and professional gutter installation? Both options have distinct cost considerations when learning how to replace gutters:
- DIY Costs: Undertaking the project yourself primarily involves the cost of materials such as gutters, offset bends, and wall plugs.
- Professional Costs: Hiring professionals guarantees that the job is done quickly and efficiently.
The cost typically includes labor and materials, and it guarantees that issues like incorrect rainwater diversion are avoided.
This option costs more but reduces the risk of mistakes and personal injury from falls or improper installation.
How to Maintain Your New Guttering System?
Once your new guttering system is installed, maintaining its condition is essential for long-term functionality.
Homeowners should consider routine maintenance tips to prevent debris buildup and water damage.
Furthermore, exploring the addition of gutter guards can be an effective measure to minimize the need for frequent cleanings.
Routine Maintenance Tips for Gutters
Maintaining your new guttering system effectively can significantly extend its lifespan and enhance performance. Regular checks are essential to prevent blockages and guarantee water flows smoothly.
Here are some key maintenance tips:
- Clear Blockages Regularly: Remove leaves and debris from one end of the guttering to the other, paying special attention to the middle of the gutter where blockages commonly accumulate.
- Inspect and Tighten Components: Check for loose screws at the edges and verify that the stop end and socket are securely fastened to prevent leaks.
- Check for and Repair Damage: Look for holes or cracks in the guttering. Confirm there’s a slight fall towards the downpipe to facilitate water flow and prevent pooling.
Preventing Gutter Damage
Adopting proactive maintenance strategies is essential to prevent gutter damage and guarantee the longevity of your guttering system.
Properly aligning the pitch of the roof and adjusting the tilt of the gutter guarantees efficient water flow. When installing, make sure to securely fasten two sections of gutter onto the fascia, and always leave a 10mm gap between them to accommodate for thermal expansion.
It’s vital that the round guttering and downpipe are clear of debris to prevent blockages. Gutters are also positioned to direct water away from the house’s base, protecting the foundation.
Regular checks and minor adjustments are everything you need to maintain the effectiveness of your guttering system.
When to Consider Gutter Guards?
After implementing proactive maintenance strategies to prevent gutter damage, homeowners may also want to reflect on the addition of gutter guards.
Here’s why and when to contemplate them:
- Debris Accumulation: If leaves and debris regularly accumulate at the opposite end of the gutter near the downspout, causing blockages, gutter guards can prevent this issue.
- Maintenance Frequency: If you frequently climb a ladder to clean out the gutters, installing guards can reduce the need for such tasks. This is particularly useful if the gutters are high above a balanced center of gravity, making maintenance dangerous.
- Prevent Damage: Gutter guards help maintain the integrity of the gutter’s back edge, wall connection, and pipe entry points by reducing the pressure and weight from accumulated debris, which can bend or break gutters over time.
Conclusion
In summary, replacing gutters is vital for protecting a home’s structure. Recognizing the signs of deterioration early can save homeowners significant costs and prevent damage. Individuals can guarantee a properly functioning system by following the outlined steps for gutter replacement and installation. Additionally, understanding the associated costs and implementing regular maintenance practices will prolong the life of the gutters, ultimately safeguarding the property from water-related issues.


